Introduction
My previous post, OCI - Create compute instance, described the steps to create a compute instance in Oracle Cloud Infrastructure. Now it's time to connect to that compute instance.
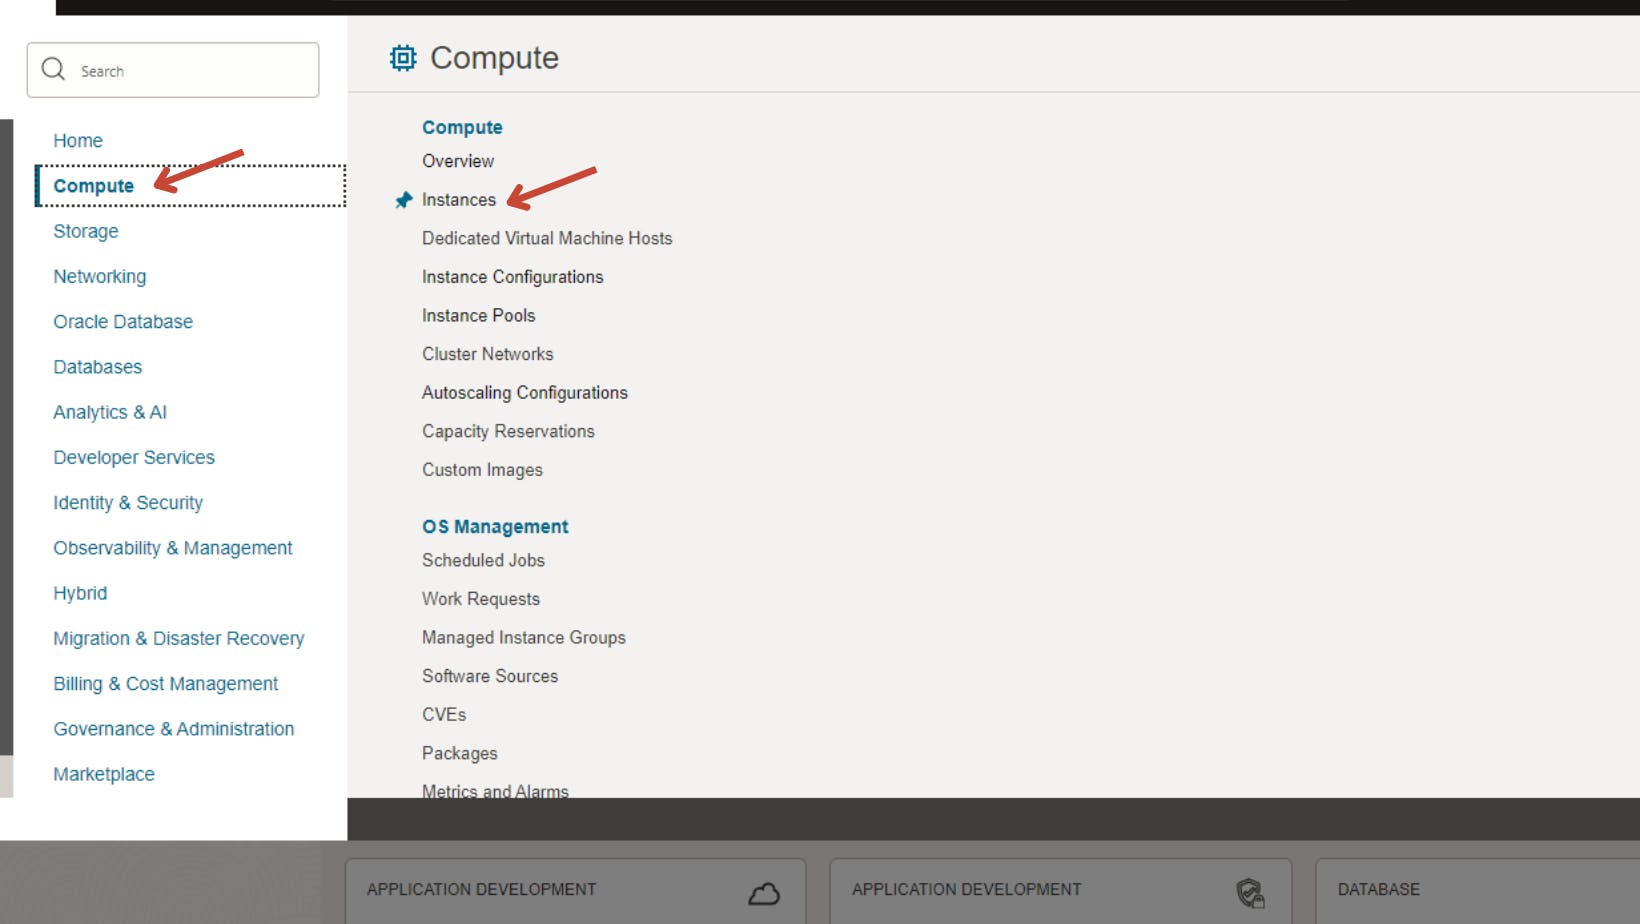
Compute instance details
Access to your compute instance details.

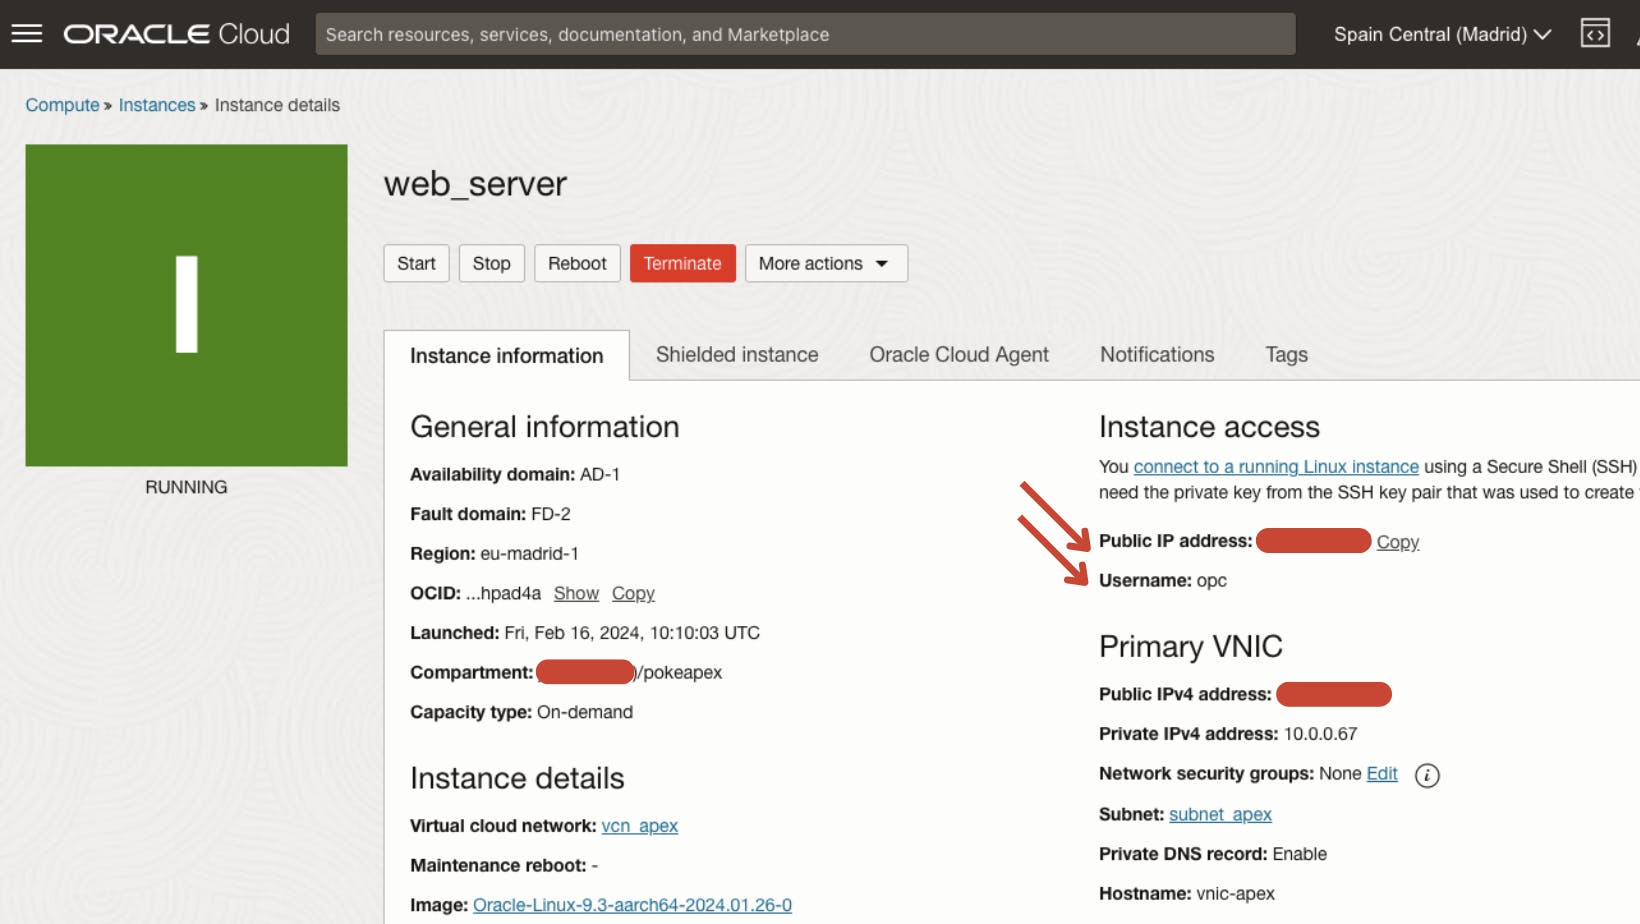
Take a note of the Public IP address and Username under Instance access section. These are the connection details needed to access your compute instance through SSH.
Oracle Cloud Shell
Oracle Cloud Infrastructure (OCI) Cloud Shell is a web browser-based terminal accessible from the Oracle Cloud Console.
Oracle Cloud Infrastructure (OCI) Cloud Shell is a web browser-based terminal accessible from the Oracle Cloud Console. Cloud Shell is free to use (within monthly tenancy limits), and provides access to a Linux shell, with a pre-authenticated Oracle Cloud Infrastructure CLI, a pre-authenticated Ansible installation, and other useful tools for following Oracle Cloud Infrastructure service tutorials and labs. Cloud Shell is a feature available to all OCI users, accessible from the Console. Your Cloud Shell will appear in the Oracle Cloud Console as a persistent frame of the Console, and will stay active as you navigate to different pages of the Console.
On the right hand side of the navigation bar, click on Developer Tools (the console icon) and select Cloud Shell. A terminal will be placed within your browser.

Upload SSH keys
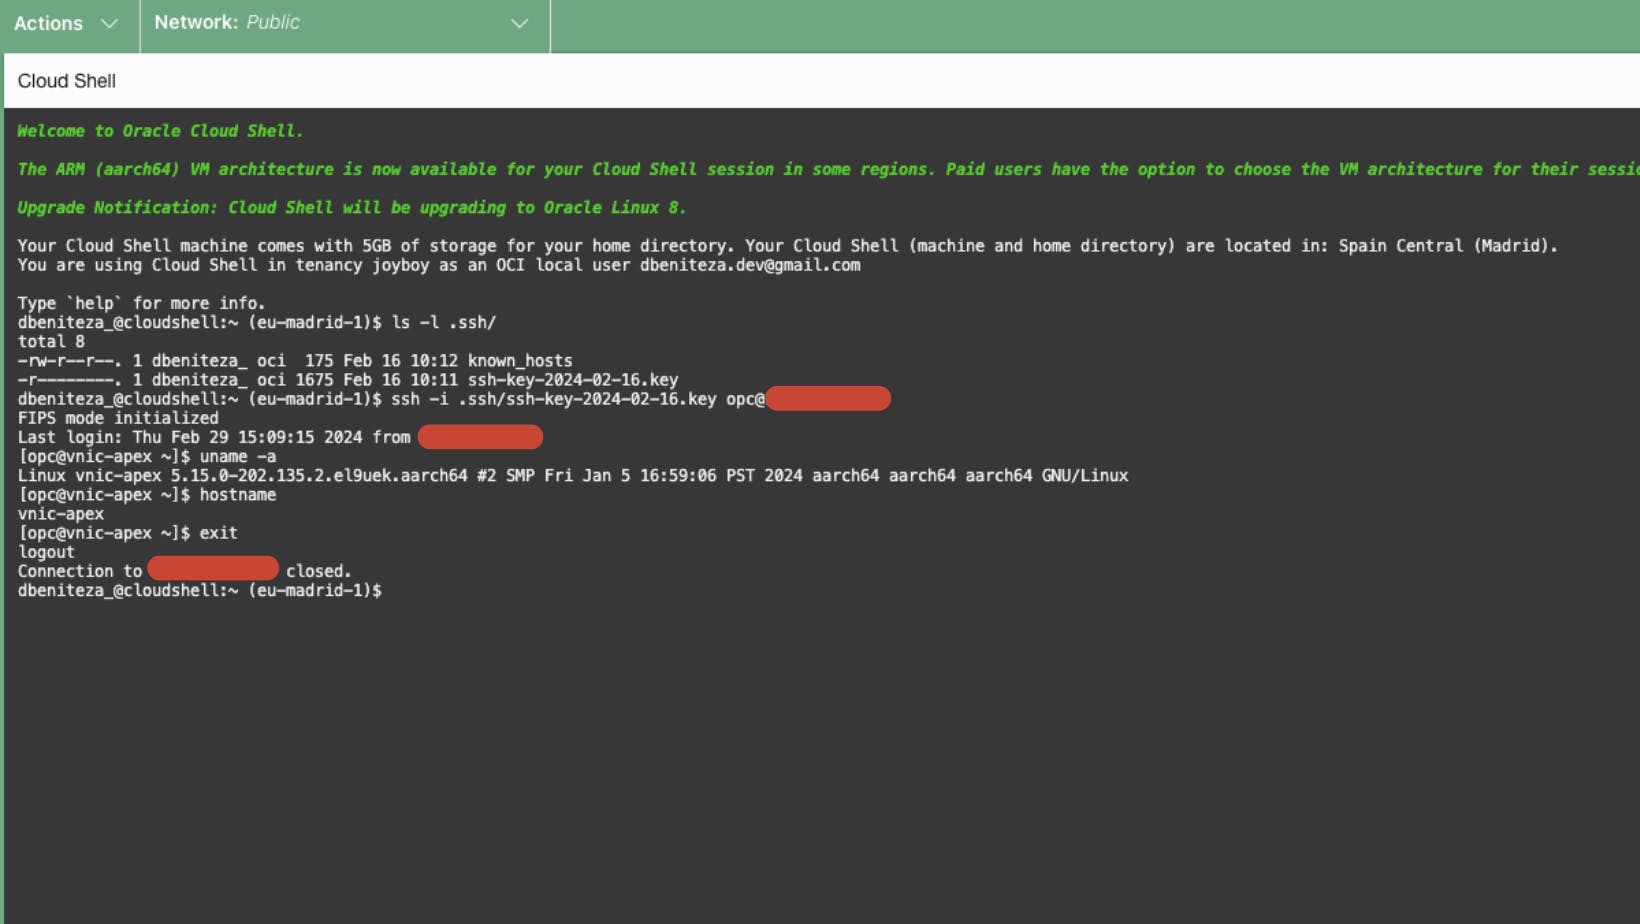
Now, let's upload the SSH keys. Click on Cloud Shell menu (the gear icon on the right) and select Upload.

Then drag and drop your private key. This key is the one you downloaded when creating the compute instance.


Connect using SSH
Once uploaded the key, set the file permissions so that only you can read the file and create the hidden .ssh directory if it doesn't exist. Move the private key file to .ssh directory. Then, connect to the compute instance using the key, Username and Public IP address obtained from the compute instance details.
chmod 400 <private-key-file>
mkdir .ssh
mv <private-key-file> .ssh/
ssh -i .ssh/<private-key-file> <username>@<public-ip-address>
<private-key-file>is the full path and name of the file that contains the private key associated with the instance you want to access.<username>is the default username for the instance. For Oracle Linux and CentOS images, the default username isopc. For Ubuntu images, the default username isubuntu.<public-ip-address>is the instance's IP address that you retrieved from the Console
You have to accept the fingerprint the first time you connect to the instance. To accept the fingerprint, type yes and press Enter.
When you want to leave the terminal, just type exit at the shell prompt to end the session.